This is an old revision of the document!
Home-Made Supercapacitors from Dead PC Batteries
By Paul Granjon & MIchka Mélo
This page reports the wonderful citizen science R&D workshop we had at FoAM with my dear friend Paul Granjon, a world-reknown artist specialized in human-machine co-evolution and participatory upcycling workshops.
During three day, we tried to upcycle dead PC batteries into working supercapacitors, originally to feed a self-watering system on FoAM's bioproductive balcony.
We ended up being deeply involved with our upcycled supercapacitors manufacturing research and did not proceed to build the rest of the self-watering system. During the workshop, our interest slided from trying to reproduce a design from Robert Murray-Smith based on upcycled batteries and cuttlefish bone graphene to make a 100% upcycled supercapacitors out of dead PC batteries. We ended the workshop having no functional supercapacitor, but we still obtained some interesting results.
Best design
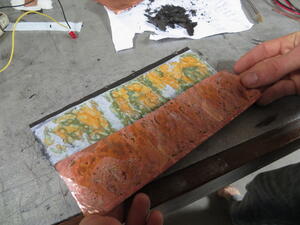
Our best design was very simple. It was a sandwich design, which means that it was just a stack of dry material layers we taped all together. It contained three layers:
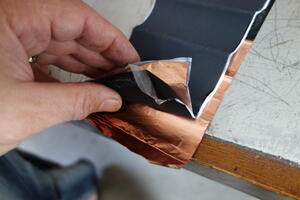
- An insulating material (plastic film) layer from a dead Toshiba battery - given away by Hackerspace Brussels, covered with graphene, a black powdery (or sometimes flaky) material
- A cleaned up insulating material layer from the same dead Toshiba battery
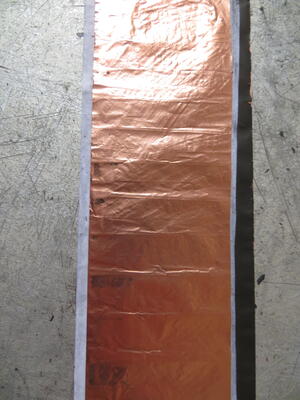
- A copper layer from the same dead Toshiba battery
This design had the following characteristics:
- It charged instantaneously - no change on current value was visible on the power source when charging.
- It displayed a quite stable 0.5 V after charging. FIY, our design had a surface area of approximately 20×5 cm2.
- When we put four in series, we could bleakly light up a small red LED, showing that there was some charge but not that much.
These characteristics are not outstanding, but still interesting for a 100 % upcycled design.
How to build the best design ?
Step 1 - Find at least one dead computer battery
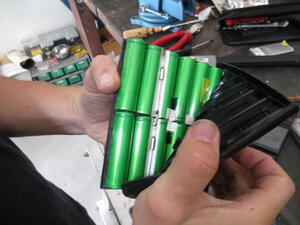
We ended up opening three of them:
- One Apple Macbook Pro 15' battery
- One Toshiba battery
- Another Toshiba battery, made of Panasonic round batteries
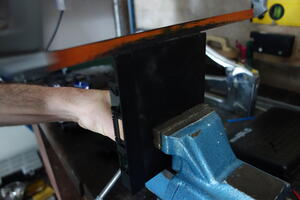
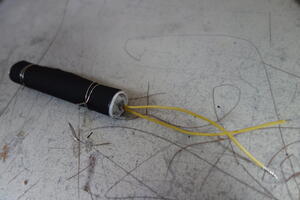
To open them, use a hacksaw and/or a cutter, and make sure that you are not damaging the internal material. All three designs where made of more or less round rolls of:
- A lithium layer
- An insulating material layer
- A copper layer
- Intercalated layers of graphene between each couple of these three.
The Toshiba-non-Panasonic battery ended up being the easiest to manipulate. Graphene was easy to clean up from copper & insulating layers, whereas the Apple battery graphene was a nightmare to remove. Robert Murray Smith advises to let it dry for as long as possible before trying to remove it. Ease of manipulation varies with battery design & the kind of damage it overcame, which explains why you may want to start with several dead batteries to go through the process with the easiest to manipulate.
This step of the process is, in my opinion, the most hazardous. If the battery is still a little bit charged, you will end up with heat and sparks. Gloves could be useful. Even when it is not, you will have a strange smell coming out: this is the electrolyte evaporating. As we do not really know what the electrolyte is made of, it may be smart to wear a mask.
Step 2 - Clean up the graphene from the copper layers & some insulating layers
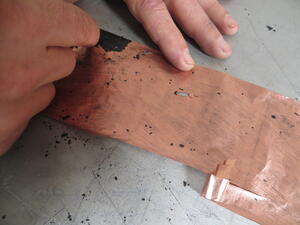
Scrap with your nails or whatever soft tools which will not make holes in the plastic or copper layer.
Step 3 - Assemble the layers
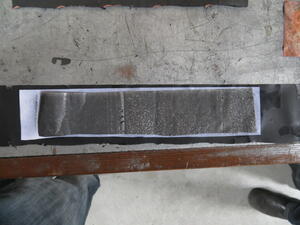
- Put the layer of insulating material coated with graphene at the bottom, with the graphene-coated side facing you.
- Tape a layer of cleaned-up insulating material on top of this one.
- Tape a layer of cleaned-up copper on top of the second one, making sure to avoid any copper to graphene contact.
Step 4 - Measure the initial voltage
Measure the voltage between the copper layer and the graphene layer. There was an initial voltage every time we assembled such a sandwich. This step allows you to see what the polarity of the design is and charge it adequately. Our negative pole was the graphene layer.
Step 5 - Charge it
Put the + of the power source on your + pole, and - on -. Check the current flow on your power source screen. We used small voltage to charge, from 1 V to 5 V. Start small.
Step 6 - Measure the charge
Once the current is back to 0 A and stable, measure the voltage between the copper layer and the graphene layer.
Step 7 - Test it
You can tape several of these and connect them in series by soldering contacts from one to another. For graphene contacts, we used a small bit of copper that we taped and tried to maintain with pressure against graphene.
Once you reach a sufficiently interesting voltage, try to connect a LED and see what happens.
Other dry designs
Except for our sandwich designs, we also had some sushi designs - which are nothing else than wrapped sandwiches. We also made some waffle designs, which are square sushis - not cylindrical.
We tried alsmost every possible combination out of the available materials from our dead batteries. Here are a few examples:
- Copper-insulating (Toshiba)-copper
- Copper-graphene (Toshiba)-insulating (Toshiba)-graphene (Toshiba)-copper
- Copper-insulating (Toshiba)-lithium (MAC)
- Copper-graphene-insulating (MAC)-copper
- Copper-graphene-insulating (Toshiba)-copper
- Graphene (Toshiba)-insulating-lithium (Toshiba)
- … and so on …
Most of the designs did not charge nor held voltage. Some held voltage poorly. In short, we described you in details the best design (by far) up on this page.
We however encourage you to try anything, as it seems that every battery type is different, and even avery battery, as the damage they overcome makes each of them quite singular in behavior.
Wet Designs
We also tried some wet designs, which means designs with a liquid electrolyte.
We tried three electrolytes:
- Sulfuric acid - following Robert Murray-Smith advice.
- Salted water - sodium chloride saturated solution.
- Demineralized water
We used two different designs to apply the electrolyte:
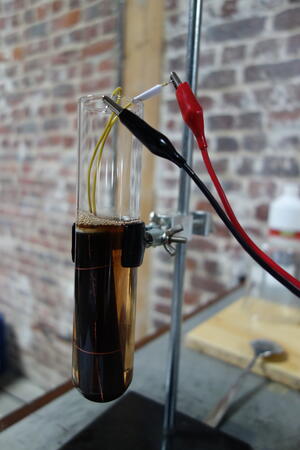
- Dipping a whole sushi in the electrolyte
- Intercalating a sandwich layer made of printer paper dipped into the electrolyte between copper & graphene, thus replacing the insulating layer from the the dead battery - we were inspired by neatpete45
Our wet designs were no success.
A sushi dipped in sulfuric acid was severly attacked. Current kept on flowing, it was bubbling slightly, the solution started to become dark. It did hold voltage and quite a good charge, but after opening it up, we saw huge corrosion spots on the copper layer.
Our sandwich with salted-water-wet paper had a similar charging behavior, and copper also ended up corroded.
Our sandwich with demineraliued-water-wet paper had a similar charging behavior, and a low and evanescent charge.
Things not to do
Do not try to absorb sulfuric acid with paper ! It produces a hot bubbly black liquid !
Audio Lab Book
A 22 minutes slideshow made of 60 photos & audio commentary containing more information is under export. I will post it on Youtube and here ASAP.
Conclusion & Future Research
Our best dry sandwich design seems interesting. However, we are not sure wether this behavior is a consequence of some remanent electrolyte from the dead battery still present in the graphene layer. Moreover, it proved to be unstable to design change: sushis & waffles could not hold the charge as well, and the voltage stored was highly sensitive to finger pressure.
On our next session, we have to focus on electrolytes, as they are responsible for the supercapacity of our supercapacitors. We will have a look into dried electrolytes proposed by Robert Murray-Smith, and we will try to make an upcycled one from the pile of (not necessarily) domestic waste at our disposal.
